Evaluator Role
Evaluator Role Workflow
Starting a new evaluation for a user is meant to be a quick and easy process. The following document will outline the intended workflow for starting an evaluation, filling in values and comments, saving a checkpoint, and completing an evaluations.
Workflow
This is the workflow for completing an evaluation
- Create a new evaluation
- Enter values and comments. Once you have finished all of the rubrics for the conference you are one, you will need to create a Checkpoint
- Create a Checkpoint to lock the values and comments that you have entered.
- Return later to complete another conference starting at step 1.1
- After you have finished all conferences and have specified all values, create a final checkpoint and 'Lock' the evaluation.
Starting a New Evaluation
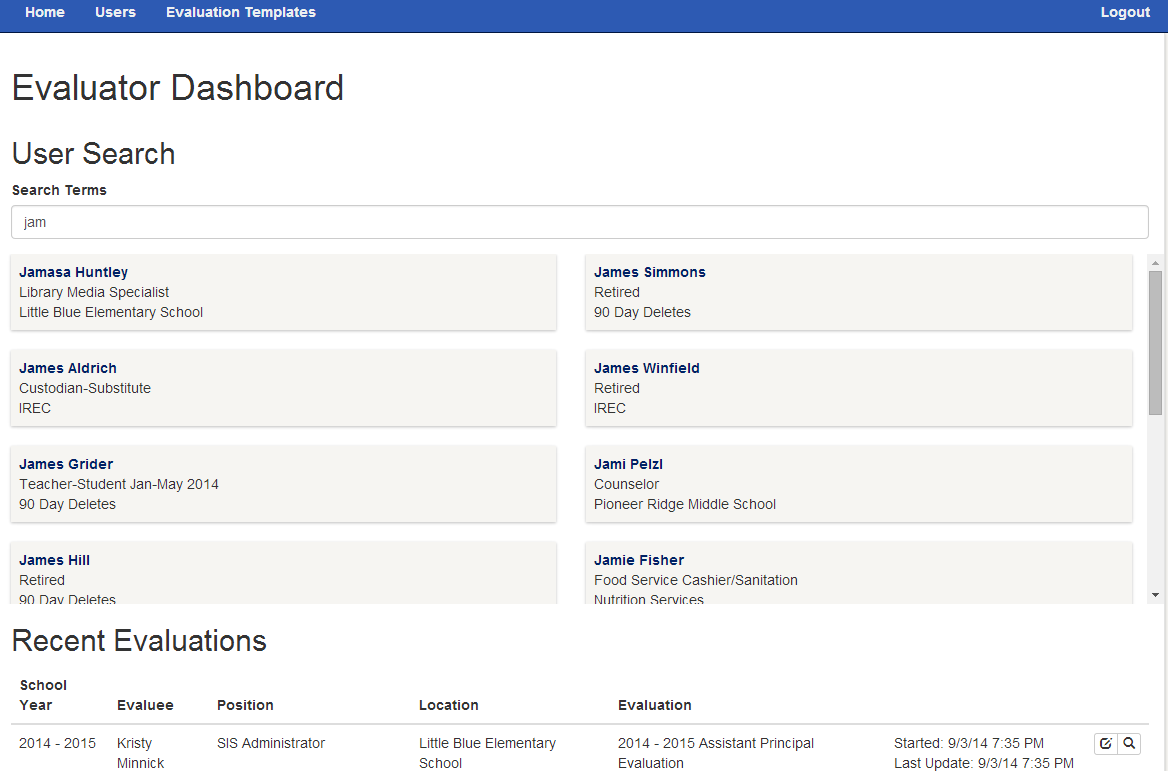
The Evaluator Dashboard is the starting point for creating a new evaluation (or continuing an existing one). All evaluations that you have started will appear in the Recent Evaluations section. They are orded with the most recently updated evaluation at the top of the list. To create a new evaluation, you must first locate the user for which you want to create the evaluation. In the User Search section type a few letters of the user's name and wait for the search results to appear. Once the correct user is visiblle click on the user's name.
After clicking on the user's name, you'll be taken to a page that lists all of the evaluations that you have completed for that user. If you want to create a new evaluation, click Start a New Evaluation.
 A window will appear asking you to specify details about the evaluation.
You need to choose which evaluation template you are going to use. The evaluations are different, so be sure to choose the correct one for the user you are evaluating.
While not as important, you need to choose the primary building for the user you are evaluating.
The user's current position in the district is populated automatically. If it is incorrect, you can edit it here and it will be stored with the evaluation. This is useful to show what position the user was in when the evaluation was completed as it may change year to year.
Click the Create button to create the new evaluation. Once it has been created you will be taken to the evaluation page to start entering values.
Evaluation Values and Comments
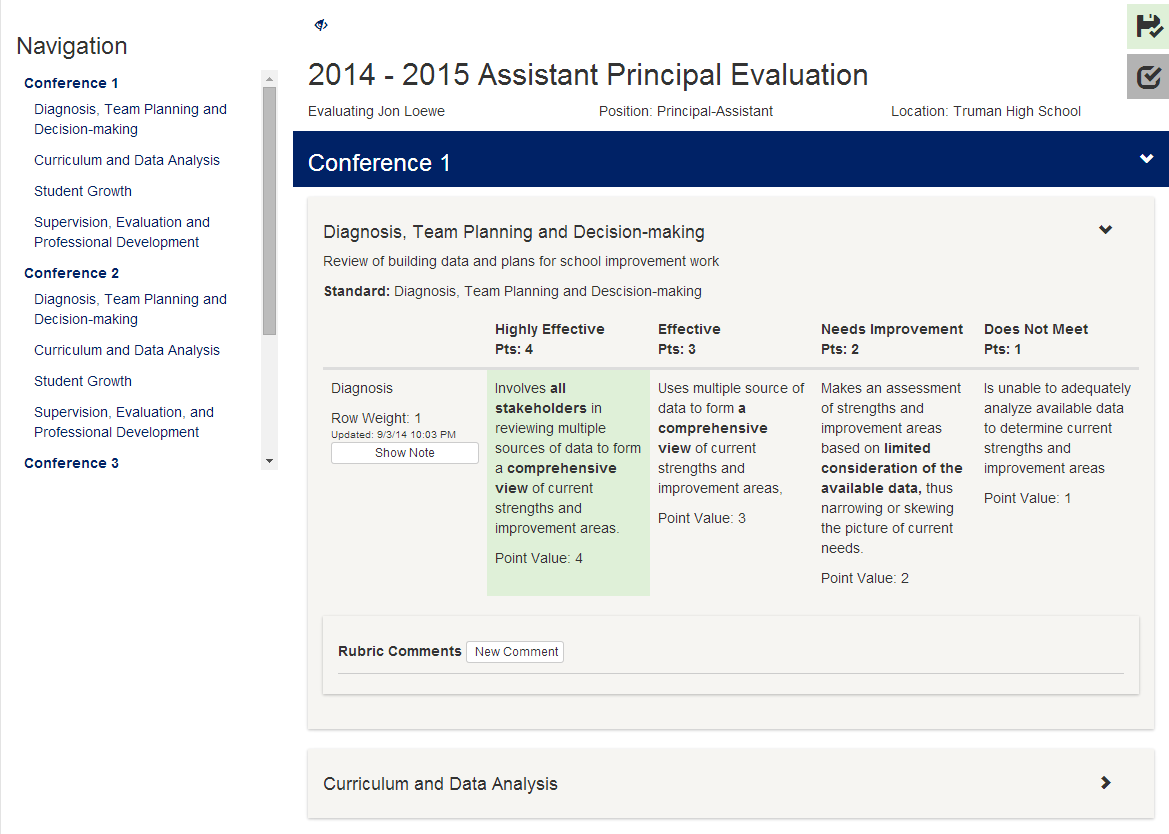
An evaluation is composed of Conferences and/or Rubrics. Conferences are simply containers for multiple rubrics and are intended to be completed in one session before creating a Checkpoint. When you load up an evaluation, all conferences and rubrics are minimized. To view conferences or rubrics, click on the name of the conference or rubric. You can also use the Navigation pane on the left to quickly jump to specific conferences or rubrics.
Specifying Row Values
To specify a value for a rubric row, just click the text in the column that best describes the user in relation to the row descriptor in the very first column. If the value is saved correctly, the column background color (of the column you selected) will turn a light green and an Updated timestamp will be displayed under the row weight in the first column. If the background color of the column you selected is yellow, the value is still being saved. If the background color is red the value could not be saved. This is likely because you have lost your connection to the internet. You can manually save the value later by either using the button that appears in the first column of the row or by clicking the disk icon in the upper right corner of the screen.
Save Indicator
Whenever a value is being saved the Save Indicator in the upper right corner of the screen will also turn yellow and a spinning save icon will appear. Once saving is completed successfully, the icon will become a disk and the background will again be green. If the saving of any value failed, the disk will have an 'X' and the background will be red. If red, the save indicator can be clicked to attempt to resave all unsaved values and comments.
Adding Row Notes
An optional note can be saved for each rubric row. To show the note entry block, click the Show Note button in the first column of the row to which you want to add the note. A text entry box will appear below the row values. The note is automatically saved as you type. You can hide the note by clicking the Hide Note button in the first column of the row. Like the row values, the background color of the note section indicates the current save status of the note.
Adding Rubric and Conference Comments
At the end of each rubric, the end of each conference, and the end of the evaluation, there is a section to add additional comments. Regardless of the location, to add a new comment click the New Comment button. You can label the comment as an Evaluator Comment or Evaluee Comment and type your comment in the text box. The comment will be saved automatically and the background color will indicate the status of the save. Once you have completed a comment, clicking the Close button will hide the text boxes and just show the text of the comment.
Editing a Comment
A comment can be edited by clicking the Pencil icon to the right of the comment label.
Deleting a Comment
You can delete a comment by clicking the Trash Can icon in the upper right corner of the comment.
Checkpoints
After the completion of an evaluation session (eg. a conference) a checkpoint needs to be saved. Creating a checkpoint locks values and comments. Note: At this point, the checkpoint interface is being reworked to be more mobile friendly. So, the detail below will describe information required when saving a checkpoint, but will not include screenshots of the implementation.
- When you create a checkpoint you will need to give it a name. The name should describe the session that is being completed, eg. Conference 1.
- When you have completed an entire evaluation you will choose Yes on the Lock Evaluation option. This will mark the evaluation as complete and will not allow any further edits at all.
- The evaluator's signature can be entered using the touchscreen or mouse.
- The evaluee's signature can be entered using the touchscreen or mouse.
After all of the information is entered, click Save. That will store the date and time for the checkpoint and you will be redirect to the Read Only view for the evaluation.
Locked Values and Comments
If you have completed a checkpoint, BUT have not locked the evaluation, then you will continue to see the values and comments for the checkpointed sections. By default, you will not be allowed to change values or comments without completeing an additional step to Unlock the value or comment. By unlocking a value or comment, you will remove it from the checkpoint it was originally registered in, and it will be added to the next checkpoint to be saved.
No values or comments can be changed after an evaluation has been locked. Only choose to lock an evaluation when creating a checkpoint when you are completely done with the evaluation.