Your Sites
Creating Your Site
Hi there! Are you ready to start building your own website? Are you brimming with information you just can't wait to publish online? Are you excited to finally have a home page of your own? Great! You're just a few steps away from having a spot of your own on the web.
Accessing the Site
Before you can create your site you need to be able to find the website that hosts the editor. The full address is http://sites.isdschools.org/editor. Go ahead, click the link, it will open in a new tab.
Login with your standard district username and password.
Creating your Own Site
Now, there are a couple of places to look for the button that lets you create your site.

Aww, sad face, you don't have a site yet. Let's fix that.
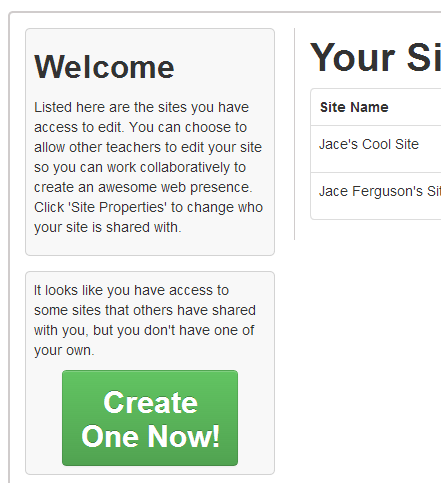
If nobody has added you as an editor to their own personal site than you'll see a big green button in the center of the page.
If you do have a friend or colleague that has added you as an editor to their site, your page will look a little different since it will list their site on your sites listing. The green button to create your site will be in the middle of the left hand column.

Once you've located the button. Click it!
Site Name and URL
When you click the button you'll be taken to a page that lets you specify a name for your site as well as choose a URL. The Site URL, cannot be changed, so choose wisely. (You only have two options, it shouldn't be that hard to make a decision.) The URL you choose will be used to directly access your site. You can print it on your business cards, have it embroidered onto your shirt, or tape it to your monitor so you don't forget. (But it's okay if you do forget, you can retrieve it later.)
Once you're happy with your Site Name and Site URL click Create to finish the site creation process. When everything is done it will take you back to the Your Sites page.
Site Properties
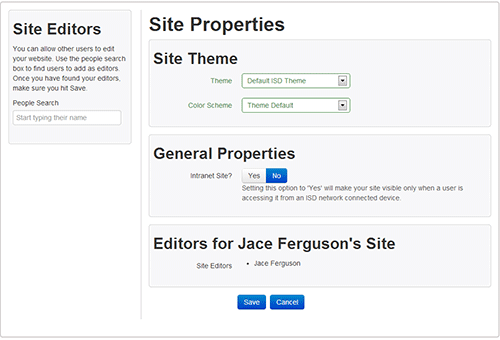
Ironically, this page lets you set properties that are relevant to the whole site. (Go figure.) Things like site theme and color scheme, whether or not to restrict access so that the site is only visible in-district, and your site's editors are all editable from site properties.

Site Theme
Your site's theme and color scheme can dramatically change the look of your site. For consistency sake, you can only change the theme and color scheme on a site-wide basis.
Theme
The theme of your site affects the overall look and layout of blocks and menus. It may include different headers and footers. Each theme has a set of page layouts that are selected when you create a new page.
Color Scheme
The color scheme changes the colors of the theme you have selected. There are a variety of color schemes to choose from and more will be added as time allows.
General Properties
Intranet Site
By choosing 'Yes', your website will only be accessible to users who are using a computer connected to the district network. Users connecting from home or other networks will not be able to see the page. Note: Please do not rely on this setting for private documents or FERPA or HIPAA regulated site content. Due to the nature of the systems supporting the ISD site editor, it is still possible for savvy users to extract data from sites set as intranet.
Editors
Collaboration is what makes the internet great! The ISD Site Editor lets you collaborate with your colleagues to make your site great. You can add as many editors as you'd like to your site. An Editor will have the ability to change any aspect of your site. So be sure to choose appropriately and discuss with that user what you are expecting them to edit. However, you can remove users at any time. And, Editors do not have the ability to add other editors.
Adding Editors
Adding editors is simple. Just start typing their name in the People Search field in the left column. After you type three characters, searching will begin. When the user you are looking for appears in the table below the search box, click Add as Editor. Make sure you hit save before you navigate away from this page.
Editing and Viewing Your Site

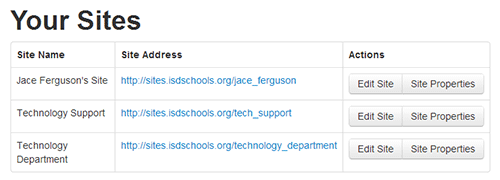
Once you've created a site or have been added as an editor to a site, those sites will appear in your site listing table. Next to the name of each site is the public web address that can be used to access the site. If you click on the hyperlink it will open in a new window. It is a good idea to open the public view before you start editing so that you have a window to view the changes.
The first button in the actions column, labeled Edit Site, will open the website in edit mode.
